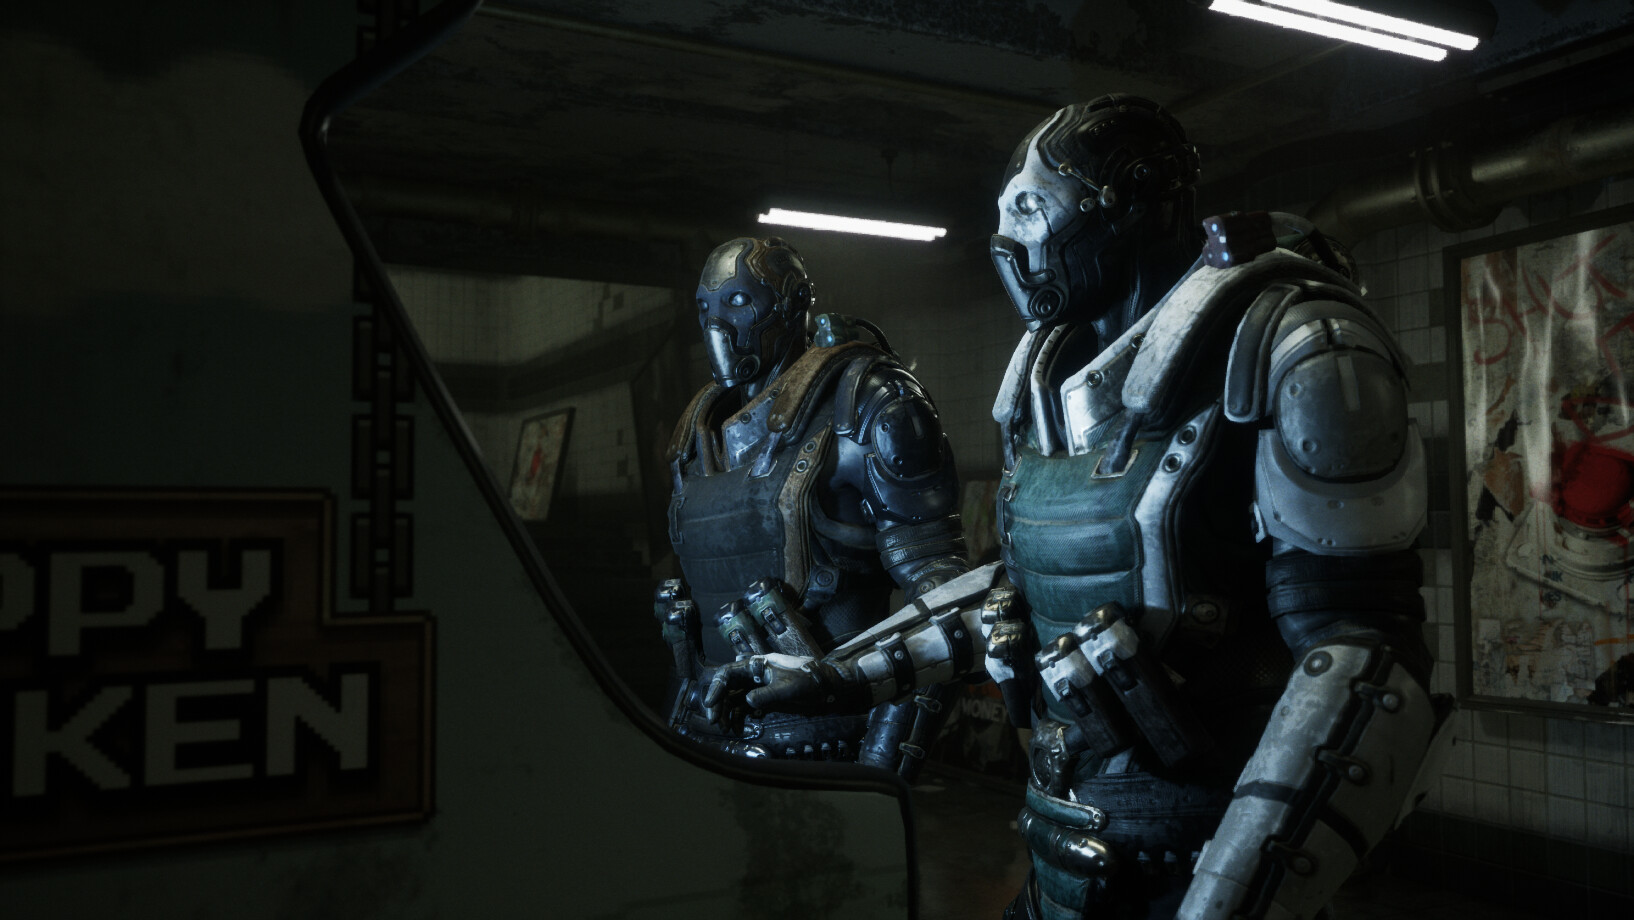
I don't often get a chance to light for cinematics, so I was delighted to get this opportunity! I was given this standoff sequence and told to light it in Lumen. Everything else was left up to my discretion. Upon seeing this sequence, I knew I wanted to call back to another famous subway scene standoff.
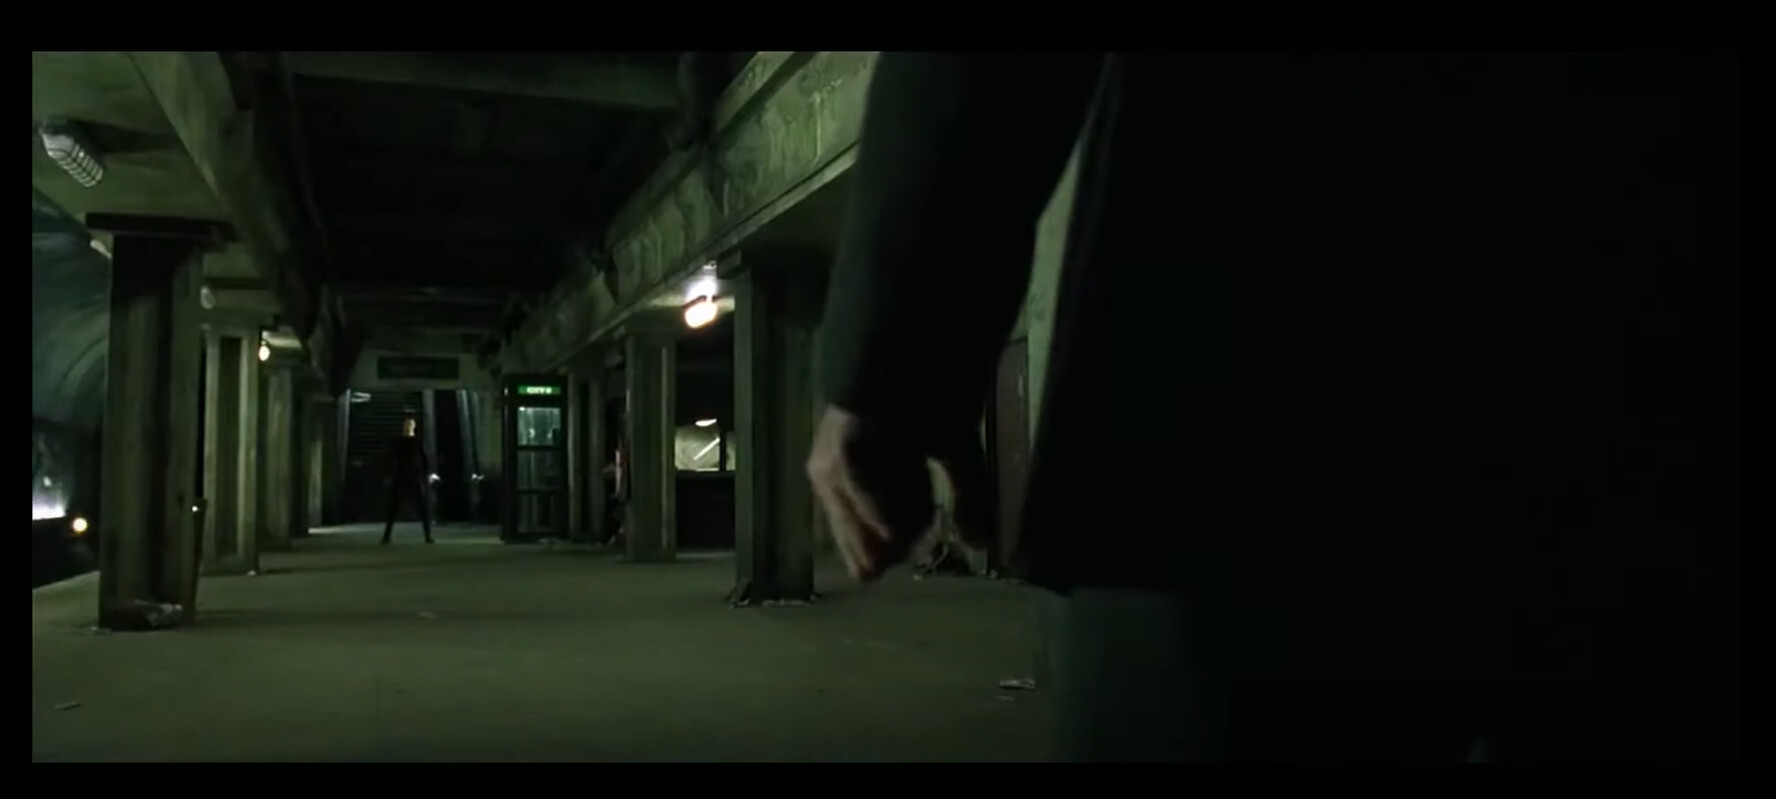
So, the first step of my lighting process is underway - gathering references and deciding what to emulate and discard. Immediately I settled on a green-tinted environment. In the reference scene, the characters are made to stand out with white light. Keeping the characters separated from the environment using color is a good first step.
The one aspect I need to discard is the dark value in the reference. Those darks get too close to true black for me, and while the Matric could pull it off, I feel like losing so much detail in the dark would detract from the scene.
So! The plan is set! Or at least a general idea of what I will be doing. When first opening the scene, I must ensure all lighting is gone and that I'm working from a blank slate. This means all lights, post-process volumes, exponential height fog, and sky atmospheres are deleted. Then I need to add all of those back in myself. I generally use the Env. Light Mixer to quickly add back these actors - ad since I'm using Lumen, I apply that to the Methods in the post-process volumes(while I'm turning off auto-exposure).
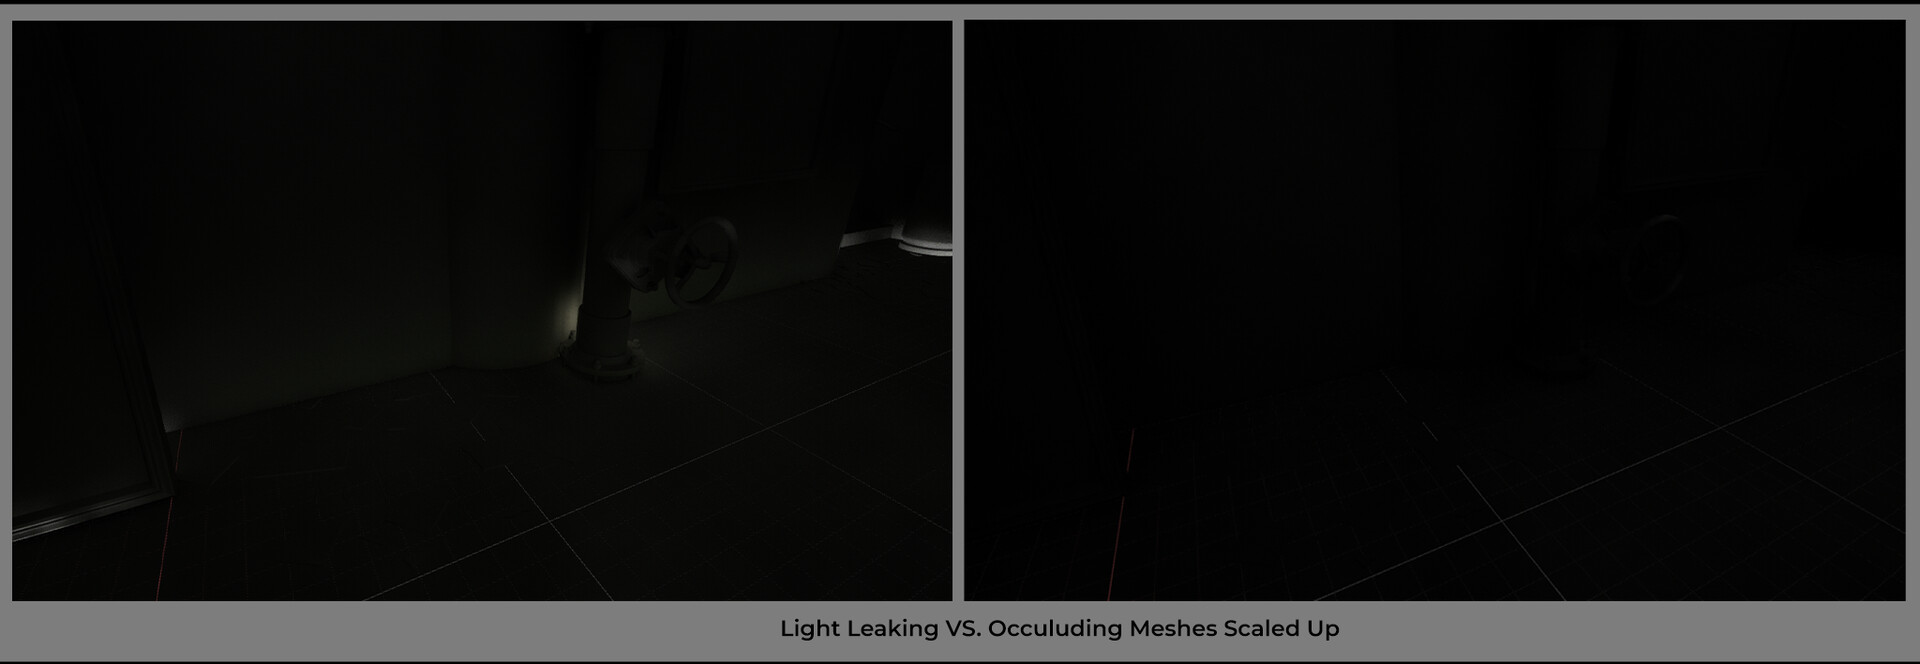
This scene is mostly enclosed, but the walls are paper thin. This generally doesn't cause an issue, but Lumen's global illumination(GI) is prone to light leaking at junctures of thin walls and floors, so I scale the existing occluding meshes so that the subway is as enclosed as it should be.
Interior lighting is a bit more complicated with Lumen than without. Lumen's GI has a more challenging time reaching enclosed spaces, so even with the skylight on and at full blast, it is not doing much. Therefore, I try not to rely on the skylight as hard in interiors and settle for point lights with inverse square fall-off turned off. Luckily for right now, just the environment lights should suffice.
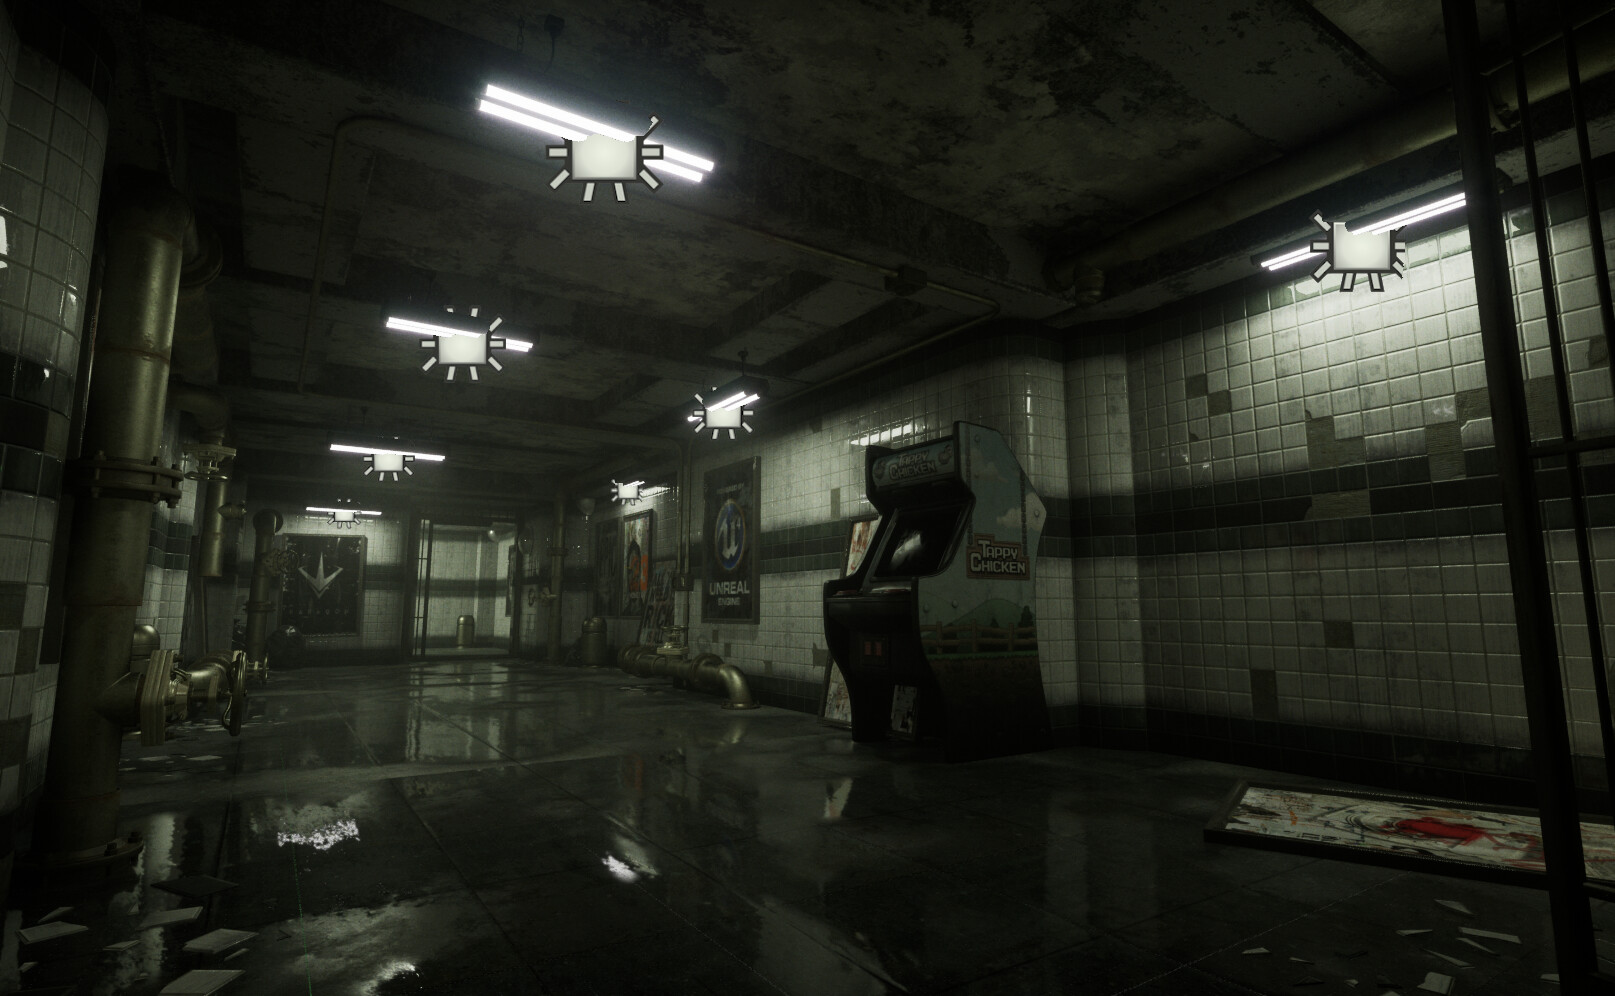
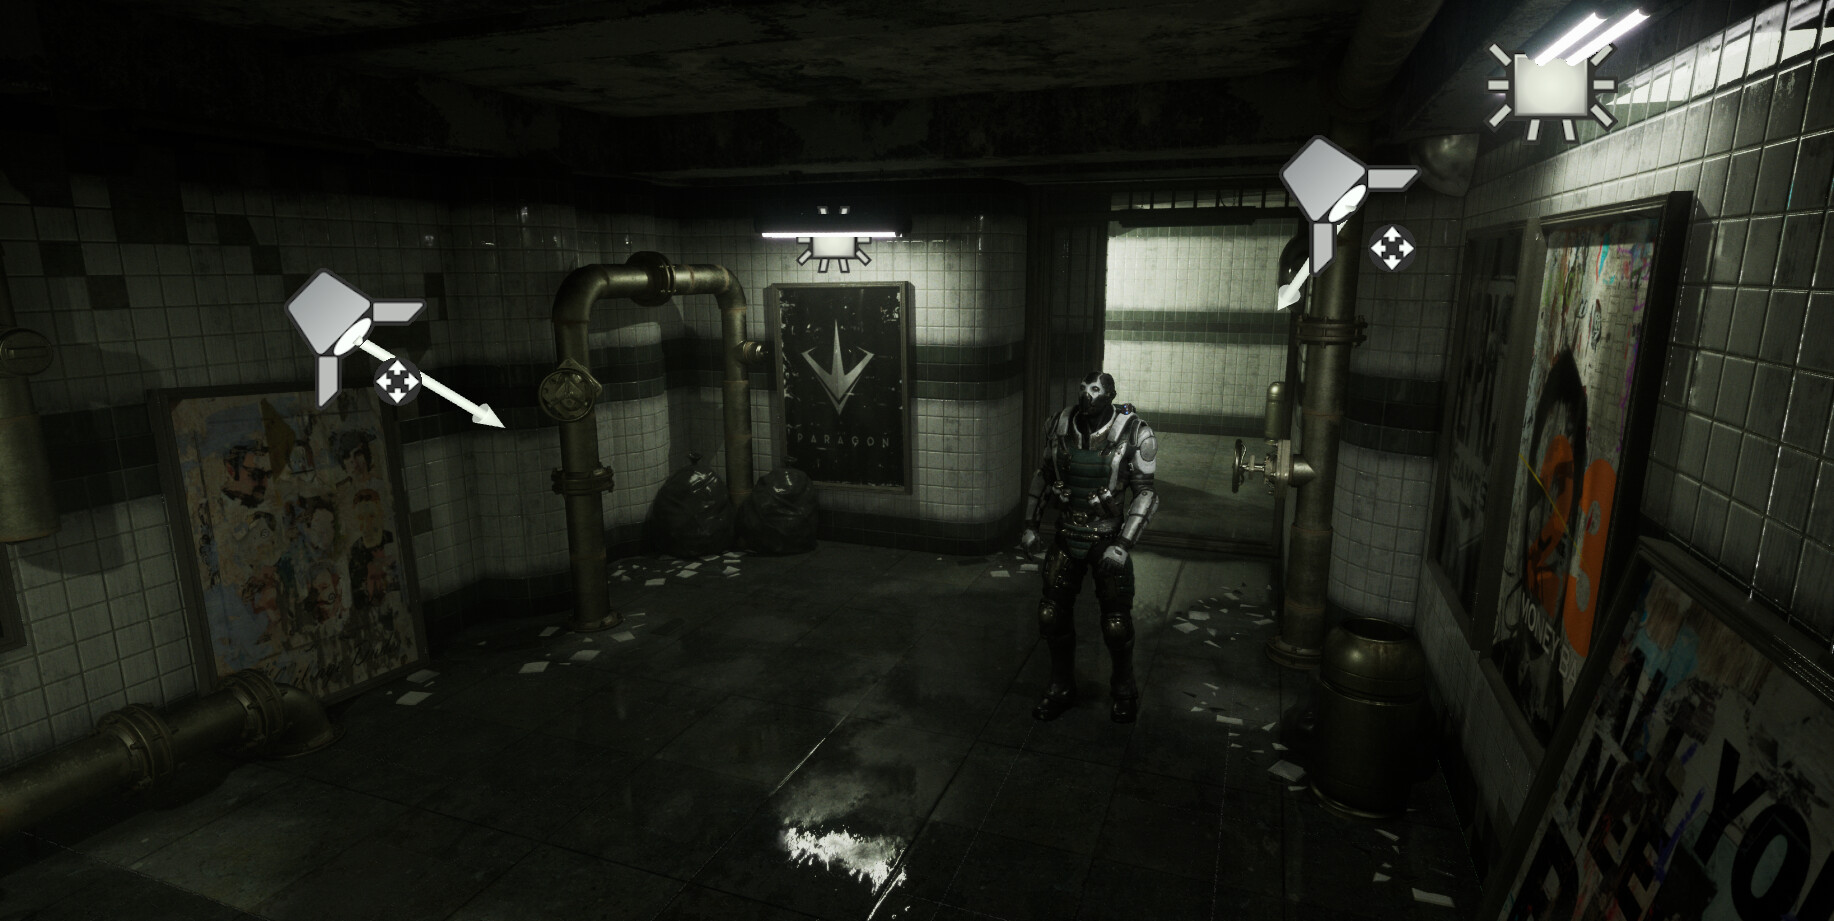
Once the global actors are set up, and the occlusion meshes are good to go, I begin lighting the scene by putting lights where lights would logically be. There are quite a few overhead lights that I put rect lights on, and point lights go in the halls around the corners, just out of sight.
Just by themselves, the Rect and Point lights wouldn't be enough, but the emissive materials also cast light (yay Lumen), so I move on to lighting shot-by-shot.
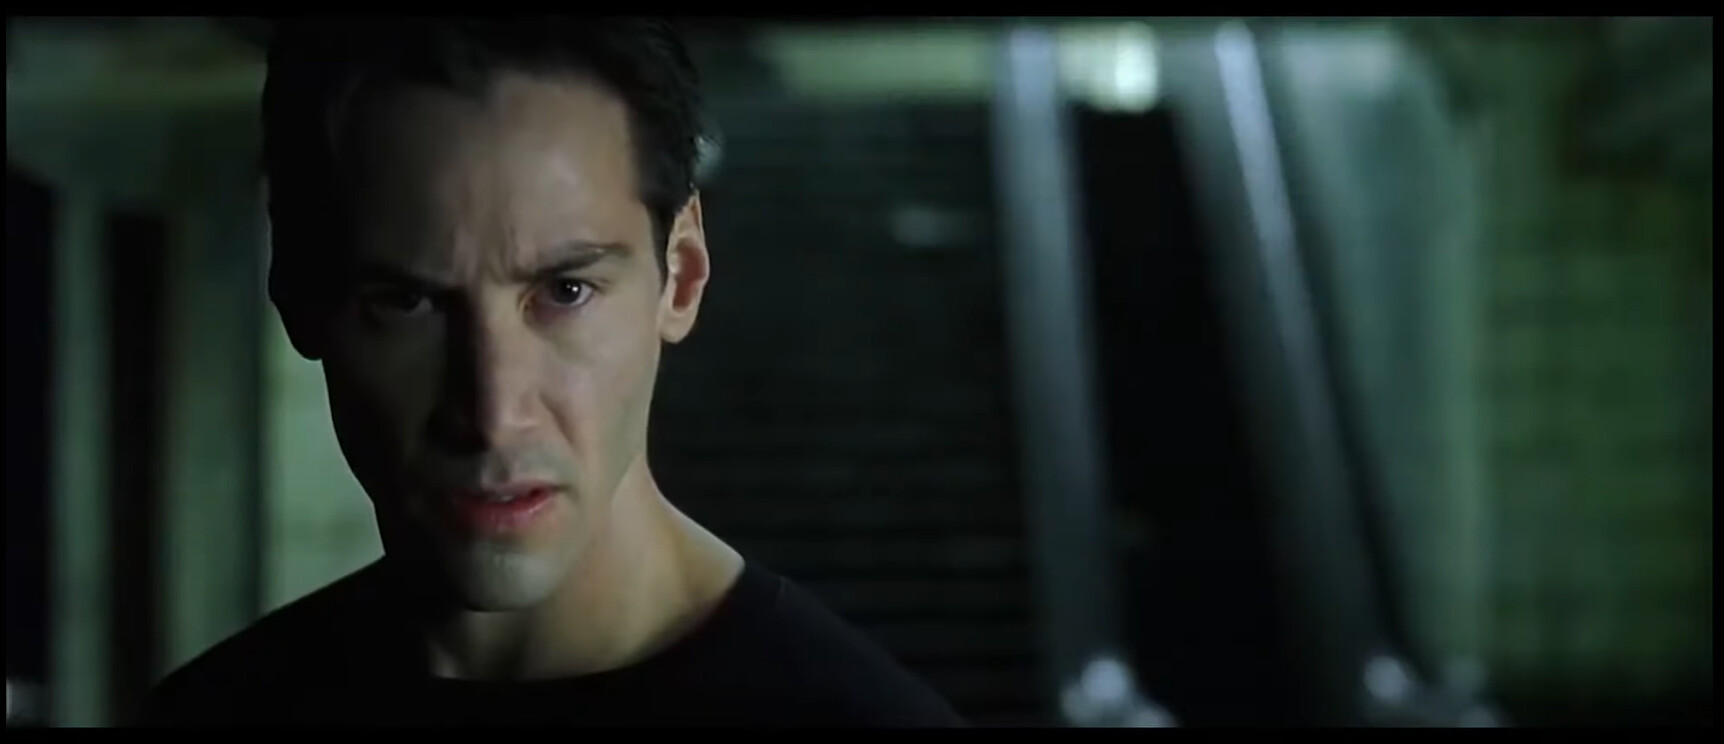
The characters will need to have their own lights dedicated to them for each shot - a key light and a rim will work with the environment lights acting as the fill. Throughout the sequence, I keep two lights on each character, which are more white than the environment lights (again, green tint.) It took some time to animate them because the characters move during the sequence.
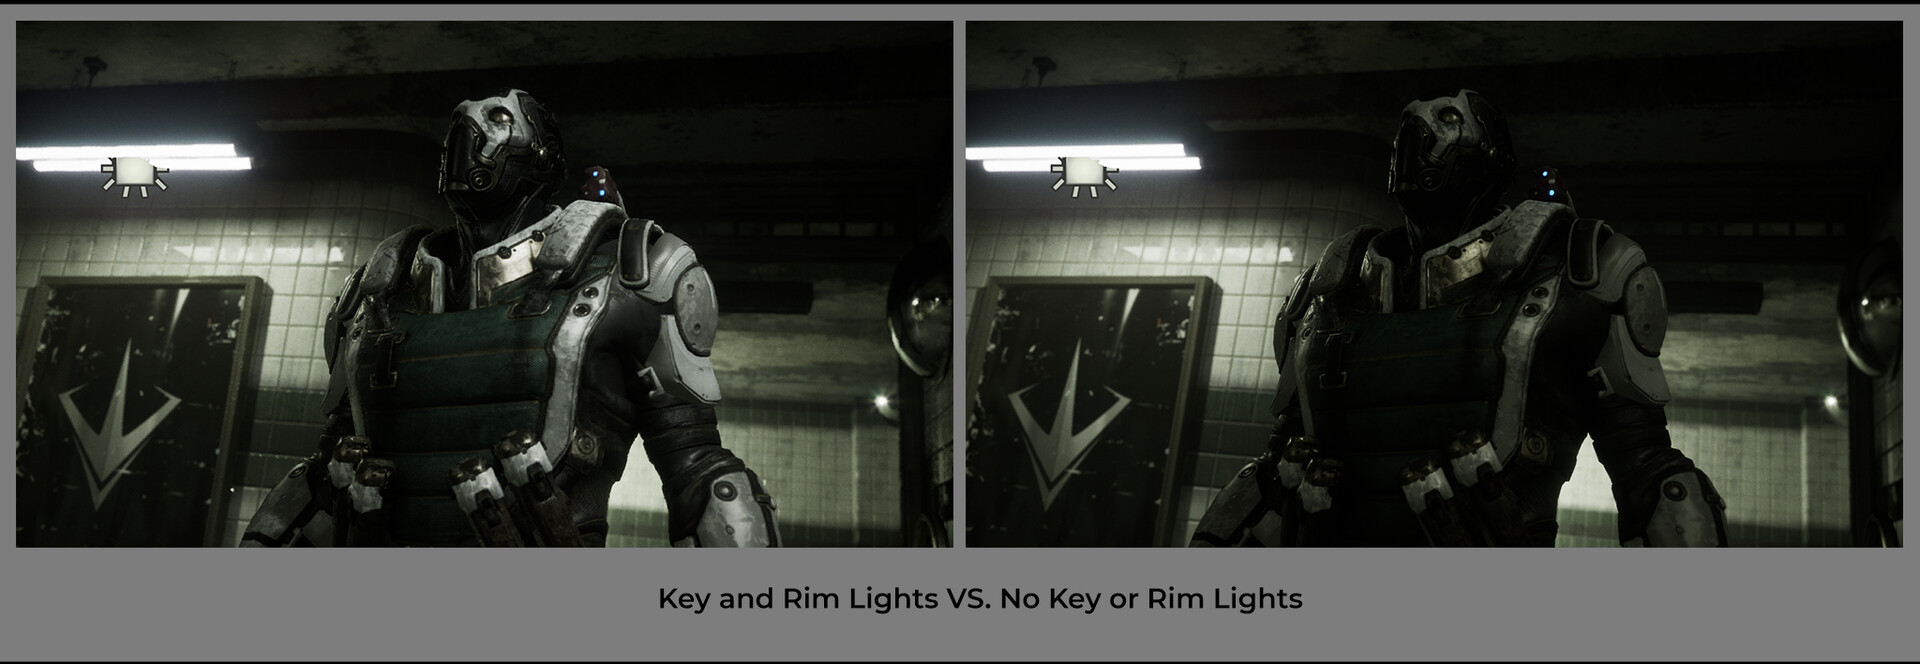
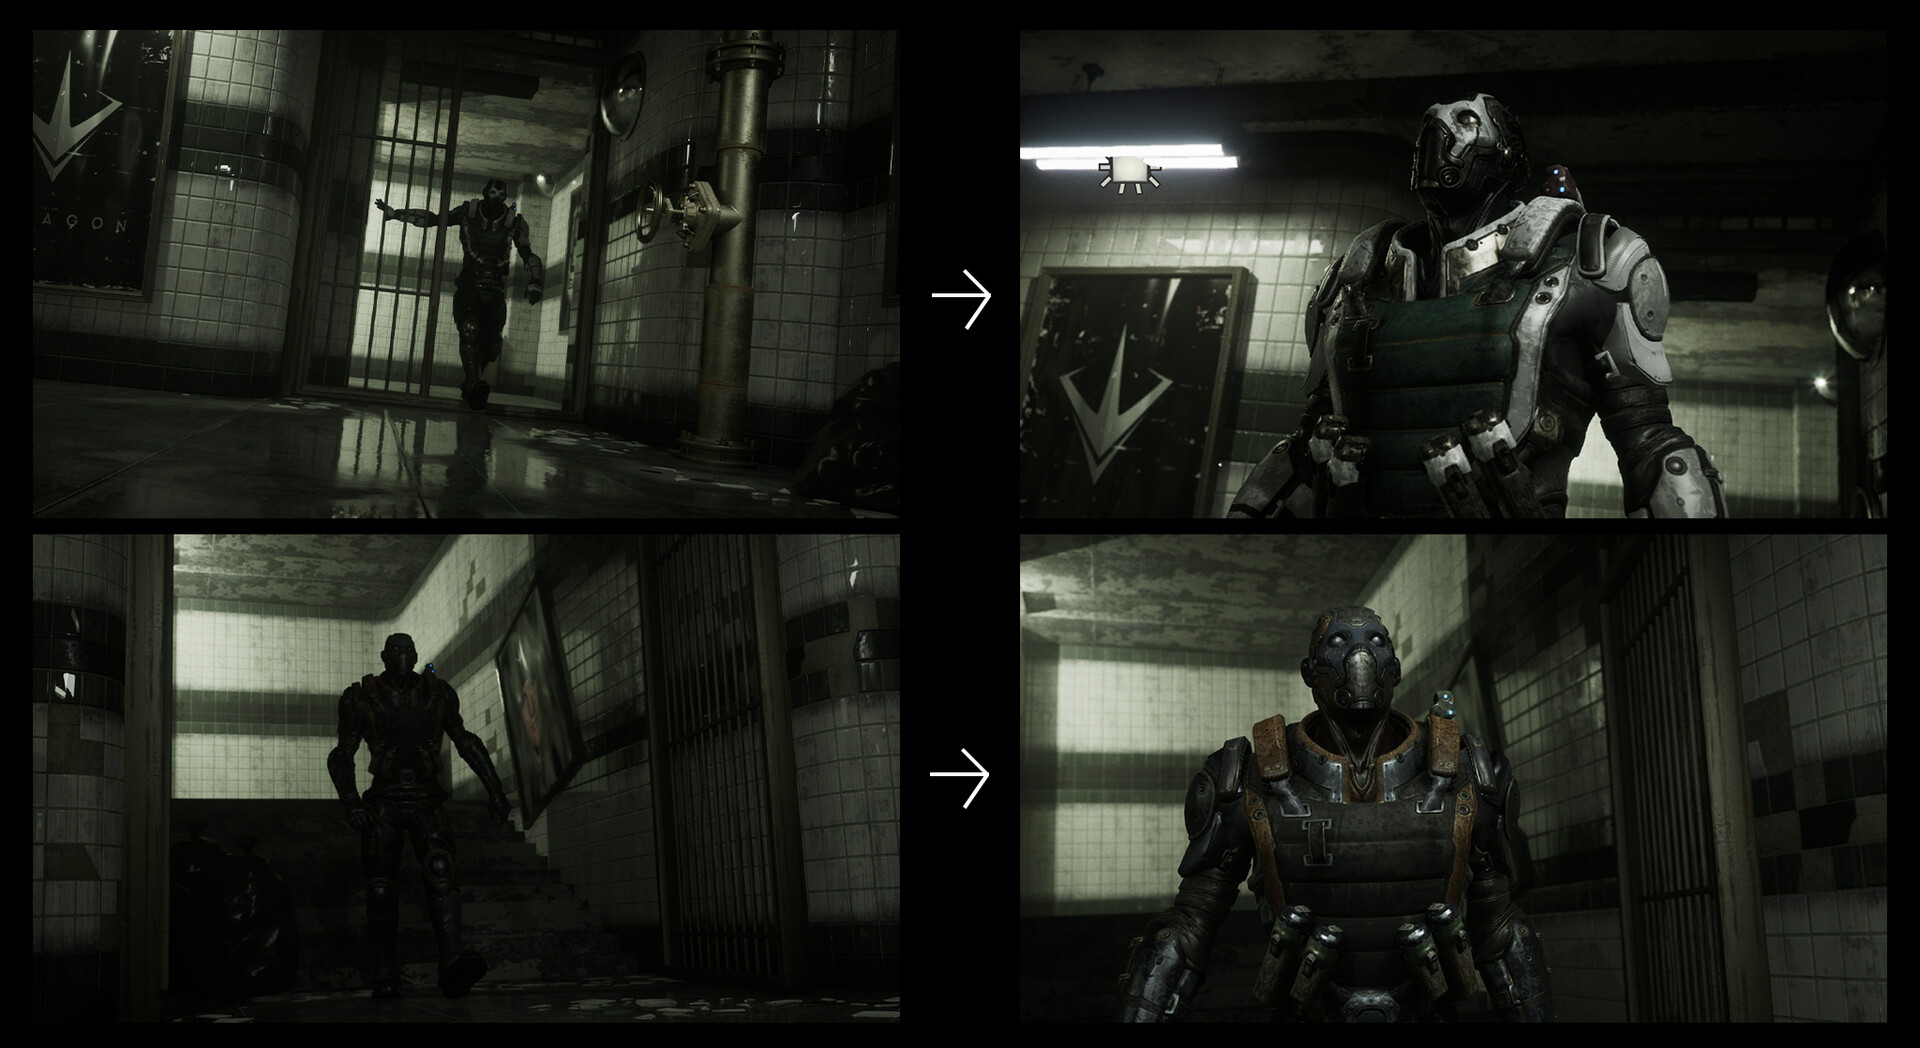
These character-specific lights follow the characters for most of the sequence, except for the very beginning. I wanted to establish a small moment of suspense and reveal for each character; highlighting their silhouettes and then bringing in the key and rim lights was a way to do that. For the light character, it's a bit harder to pull off. Creating a dark silhouette for a light-colored character is challenging, but With the way the sequence plays out, he may be seen as more of a 'hero' or main character. So he doesn't need to have much suspense. On the other hand, the dark character was much easier to get a silhouette of, and in turn, he seems more threatening(especially with how long the camera focuses on his entrance.) Both characters step into the key and rim lights in here, and these lights stay with them until they start charging each other.
The charging shots were an interesting challenge because I want the characters to be well-lit and visible, but the overhead lights should have a dramatic flashing effect while they run. Do I keep the character lights animating with them as they run? Or do I drop those lights and just let the overhead lights do all the work?
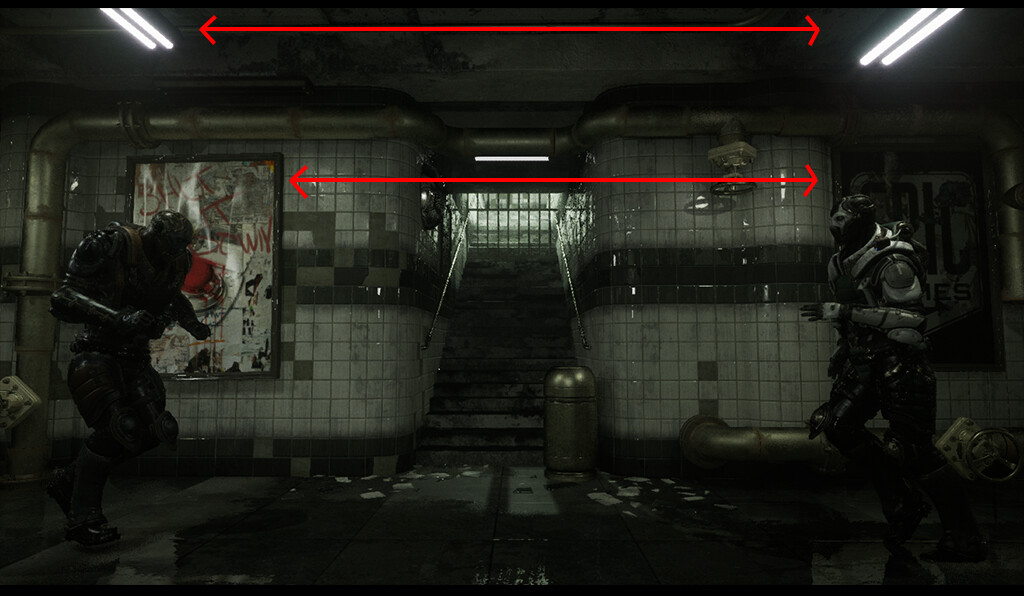
Ultimately, I kept the key and rim lights back and let the overhead lights and background do the work. I pulled one of the key lights to illuminate their meeting point instead and kept that light at a similar intensity to smooth the transition to the closeup shot. I had to make a few environment tweaks, such as changing the position of the overhead lights so that they'd be symmetrical and the pictures on the wall to help the characters stand out.
The black epic poster had been behind character 2, and it was hard to see him. Small environmental adjustments can help separate the characters from the background.
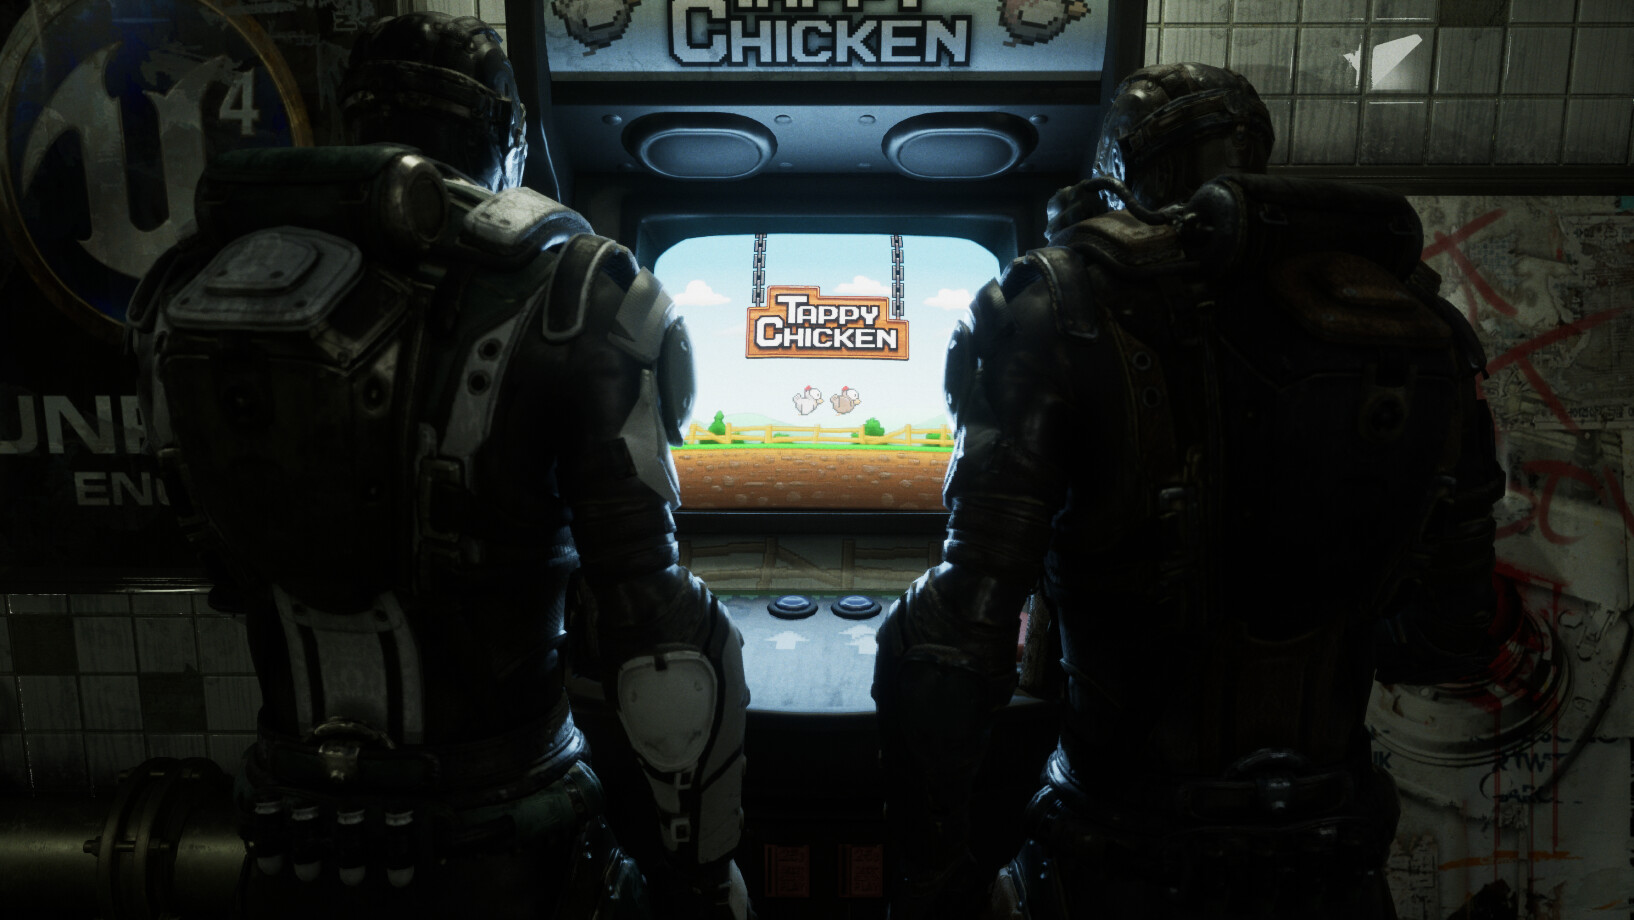
One of the changes I made was to the arcade machine screen. Originally, the screen was slightly desaturated to match the grungy look of the environment. I brought up the saturation to convey a mood shift in the scene. We went from a suspenseful Neo vs. Agent Smith standoff to a slightly comedic atmosphere. I felt that more saturation in color would enhance the shift. I also have a rect light on the screen boosting the blue illumination and brought down all of the background environment lights to emphasize the blue color. Really the main lights in the last few shots are the blue screen light, the overhead rect light about the machine, and some ambient fill light from the environment lights.
A final touch I added to the sequence was a slight flicker on some overhead lights. In the audio, there is an electrical sound that I interpreted as the electricity in the lights shorting out. In sequencer, I animated the overhead lights flickering a little offbeat from each other.
The last step of the process was color-grading the scene in the post-process volume. I mostly made small adjustments to the shadows and mid-tones so my darks wouldn't get as close to true black as the reference. To top it all off, I added a bit of film grain for some interest. I would have loved to have some raytracing in this scene, but game cinematics still needs to consider real-time performance, so sadly, no hardware raytracing is enabled.
Since I wanted this scene on my portfolio, I rendered it using the Movie Render Queue and a present I had previously made for my Lighting Rig(previous project.) The present was set for some anti-aliasing and override variables. And here it is! I had a lot of fun with this and can't wait to get another cinematic to work on. Please let me know if you have any questions, comments, or feedback!
Until next time!